Where and how an access point (AP) is hung is a simple process that requires planning and logical decision making based on a handful of factors, including the surface material, the mounting type of the access point, and the neighboring entities. Using a combination of proper mounting equipment and precise placement allows for an access point to perform to the best of its ability.
Common Mounting Locations
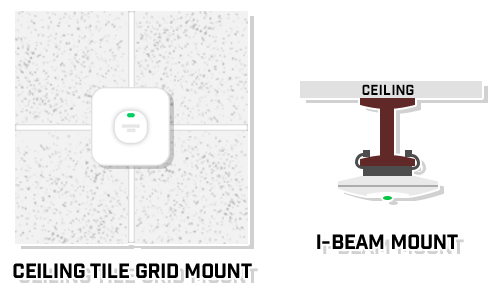
Typically, APs are mounted to ceiling grid tiles. These tiles are best for installing APs since they are easy to maneuver around and drill through. However, APs still need to be installed in buildings without ceiling grids. Buildings with generators or batteries often have concrete ceilings to protect the power supply equipment from any possible structural damage. For these types of buildings, it is best to mount the access point to an I-Beam, an existing conduit, or a Unistrut. Mounting to these structures is fairly simple, but a bit of planning is required in order to guarantee that the access point’s propagation will not be interfered with. Finally, while uncommon, we do sometimes have to install access points in buildings with hard ceilings, constructed out of drywall or wood.
Mounting Types
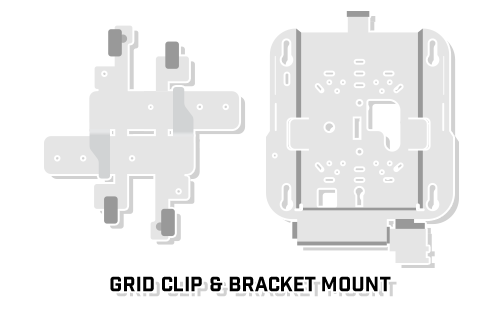
When mounting an access point to a grid system ceiling, a traditional grid clip and bracket combination is used, both of which typically come with the access point. Most business and government facilities will be able to accommodate ceiling-mounted access points. However, if a standard mounting technique cannot be used, there are ways to mount an access point to the wall. A wall mounted AP will usually require an additional mount from the manufacturer. These typically have a brace that supports the access point and allows it to lock into place, while the mount is secured into a stud in the wall. Another option is a right-angle mounting box which is a triangular box that allows for an access point to be mounted onto it while still being at its designed angle placement for the antenna. Wall-mounted access point are commonly found in hotels, warehouses, and houses since it is easier to access cable paths in the walls than in the ceilings.
Other Factors
Another determining factor for deciding where to place the access point, whether it be on a wall, ceiling grid, inside the ceiling, or to a non-standard mount, is the cable path. Not every building is built the same, and sometimes it is not possible to create a cable path in the ceiling. There are times where a cable path from the access point to the telecom closet is only possible through access panels and holes in the wall. In this case, it is best to use a wall-mounted access point so that the wire can be hidden and the overall installation will be clean and smooth. Mounting an access point to the ceiling when there is no direct cable path will just complicate the installation.

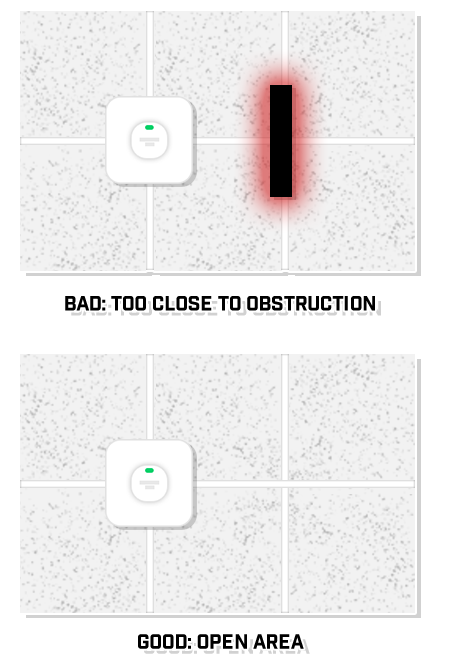
When installing an access point, it is important to be conscious of its surroundings. You wouldn’t want the access point to block an exit sign, would you? There are numerous objects both above and below the ceiling to be aware of when placing an access point. Before mounting new APs, it is imperative to be aware of all sprinklers, fire alarms, exit signs, lights, HVAC systems, security cameras, and existing access points so that nothing interferes with the new hardware. Ideally, APs should be mounted to an open section of the ceiling so that there is at least one tile between the AP and any obstructing objects. If a situation arises where this rule of thumb cannot be followed, place the access point as far away as possible from the obstruction.
All in all, hanging an access point is a simple task, but it does require some planning to ensure that the device is installed properly. If these standards are not followed, an access point runs the risk of becoming damaged from surrounding obstructions or even falling because the wrong hardware and mounting type were used.