We have recently moved to an EXE installer. This allows future updates to add and overwrite the previous versions, for quick and easy updating. In the meantime, our SCCM document is being update to accommodate these changes.
This following instructions are for Windows BridgeChecker Versions 1.9.6 and earlier:
BridgeChecker software is provided as an MSI file and can be deployed by Microsoft SCCM (System Center Configuration Manager). The same license key can be used for multiple machines.
For full how to guide see Deploying BridgeChecker with Microsoft SCCM 2012.
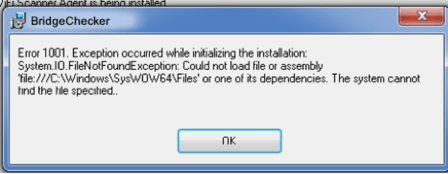
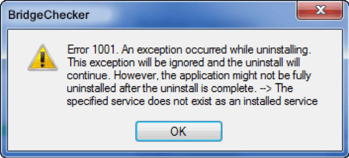
This fix is for when the Error 1001 message appears when trying to Install or Uninstall BridgeChecker on Windows 7.


- Using the computer that has the error message, go to https://support.microsoft.com/en-us/mats/program_install_and_uninstall and click Run Now
- It will download Fix It Now and upon completion, install and run the program.
- On this screen, select the second option Detects problems and let me select the fixes to apply.
- Then select whether you are having a problem installing or uninstalling a program
- Next, from the list of programs, find BridgeChecker, select it and hit Next.
- Then select Yes to try and uninstall or install.
- Then make sure that checkboxes are selected and click Next.
- Let the program finish and it will indicate whether the problem was fixed or not. Then, click Next.
You should now have BridgeChecker uninstalled or installed. If you uninstalled it, note that the desktop shortcuts and start menu items may still be visible, but they do not work. You can remove those manually.
A license key is not required for trial users.
For trial users that would like to test with a license you please use license below. In the registration screen this license will show registered user / organization as "TEST TEST ONLY".
LGhTIiTFjHa93jTgRCynhzEFwC6A+raCRqvAzCOw72h+wl6S5oBjkw==
If you purchased a license you will receive license key from support@accessagility.com
Configuration settings can be saved while in the "Config Manager" mode. These include adapter changes, policy changes, and password changes.
For machines with identical hardware, the settings.mdb file can be copied to and overwrite the file in the folder below to deploy the same identical configuration to multiple machines quickly. BridgeChecker services should be stopped on all systems before deployment of the settings.mdb file.
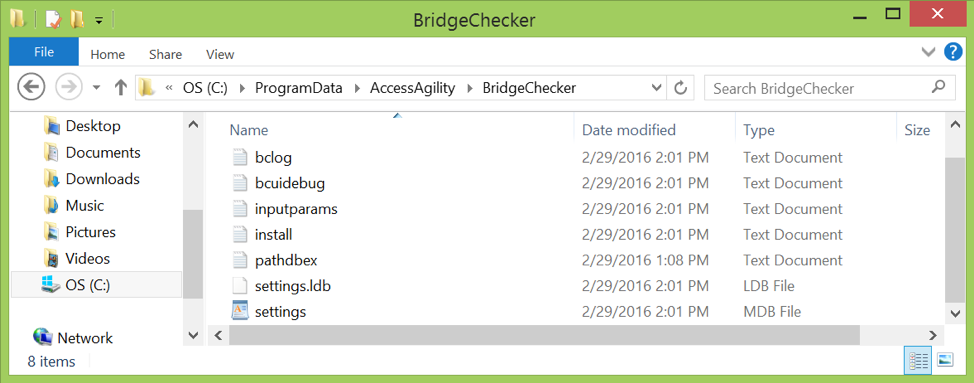
BridgeChecker stores configuration settings in the c:\ProgramData\AccessAgility\BridgeChecker\settings.mdb file.

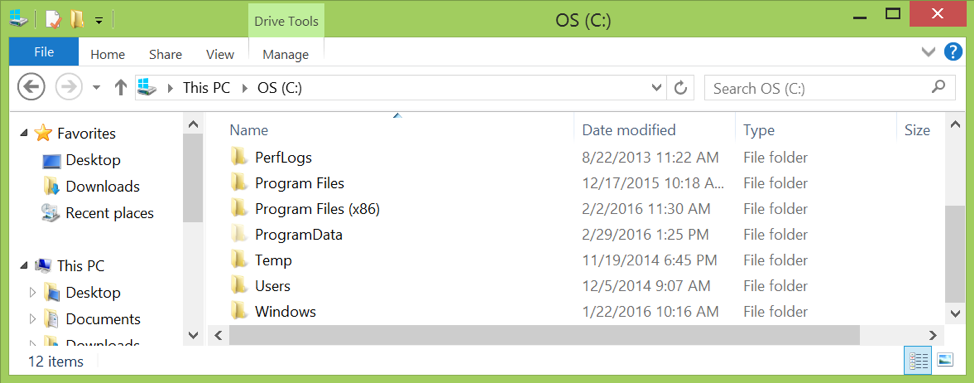
NOTE: The c:\ProgramData folder is hidden by default. Setting can be changed from Control Panel > Folder Options > View Tab
Go to http://bridgechecker.com/bclicense/index.php
Enter the Registered Email that purchased the licenses and License Key to check on the status.
DOS Command Prompt
- Log on to the computer with administrator rights.
- Find the BridgeChecker uninstallation product key:
- Click Start > Run.
- Type regedit to open the Windows Registry Editor.
- Navigate to
HKEY_LOCAL_MACHINE\SOFTWARE\Wow6432Node\Microsoft\Windows\CurrentVersion\Uninstall\ - Browse the Uninstall subkeys in the left-hand pane, and check the values in the right-hand pane to find a value for the DisplayName that equals BridgeChecker.
- Copy the uninstallation key. For example, the key for BridgeChecker could be:
A3AEEA68-AC93-4F6F-8D2D-78BBF7E422B8 - Close the Windows Registry Editor.
- Click Start > Run.
- Type cmd to open the Windows command prompt.
- At the Windows command prompt, type:
msiexec /X { product uninstall key}
Example: msiexec.exe /x {A3AEEA68-AC93-4F6F-8D2D-78BBF7E422B8} /passive
To generate a detailed uninstall log, type:
msiexec /X { product uninstall key} /l*v! log file path
Example: msiexec /x {A3AEEA68-AC93-4F6F-8D2D-78BBF7E422B8} /lv!* c:\uninstallSEP.txt
BridgeChecker stores all settings data in:
~/Library/Preferences/com.accessagility.bridgechecker.plist
Open this file with Xcode (or another program that handles plists).
Preferences are changed by 0s, 1s, and -1s:

enableWireless
Enable the wireless card if there is no wired connection
selectedInterfaceOptions
No action - Do nothing to the wireless card if a wired connection is made
Disconnect - Disconnect from the associated wireless network if a wired connection is made
Disable - Disable the wireless card if a wired connection is made
loadOnStartUp
Runs BridgeChecker when the device boots
Do not change releaseIP, as it is not supported for Mac OS.
When you have finished changing the values:
- Save com.accessagility.bridgechecker.plist
- Open Terminal and run:
defaults read ~/Library/Preferences/com.accessagility.bridgechecker.plist - Restart BridgeChecker
We have created a shell script to write the defaults to the system after BridgeChecker is installed and run at least once. Attached zip file has shell scripts and below are usage instructions.
Install BridgeChecker
Run BridgeChecker
Exit BridgeChecker
Open the update-bc-defaults.sh script file in TextEdit
Update the below option values in script file (line #5 to #9) to your preferred defaults:
- releaseIPloadOnStartUp
- enableWirelessm
- EXIT_PASSWORD
- selectedInterfaceOption (valid values are 0,1,2)
Open the Terminal and Execute command as “./update-bc-defaults.sh”
NOTE: If you receive a “Permission Denied” response, please Execute command - “chmod 777 update-bc-defaults.sh”
You can test it on any fresh machine or to test on existing system follow steps below:
- Exit BC app
- Execute - “defaults delete com.accessagility.bridgechecker” in Terminal
- Execute - “./update-bc-defaults.sh”
- Start the app and verify your options have been implemented
Sending log files with your support questions can help us diagnose the problem faster.
Windows Log Files
- Navigate to C: \ Program Data \ AccessAgility \ BridgeChecker \
- Copy and Paste all the text files within this folder into an email, or save them and attach them to an email to send with your support question.
Mac OS log files
- Navigate to /Users/<your user name>/Library/Application Support/BridgeChecker/ directory
- Copy and Paste the .txt log files into an email, or save them and attach them to an email to send with your support question.
NOTE: If you do not see the Library folder, it is hidden.
- Open Terminal found in Finder > Applications > Utilities
- In Terminal, paste the following: defaults write com.apple.finder AppleShowAllFiles YES
- Press return
- Hold the Option/alt key, then right click on the Finder icon in the dock and click Relaunch.


